
How lucky was I? I managed to get some samples of one of the
SAA’s newest products, Sculpture block
and sculpture canvas . Being someone who
is deeply rooted in 2D work, then the chance to try something new, to bring
further depth into my work ,was intriguing, but also slightly scary. But really I should not have been nervous
about it. I thoroughly enjoyed working
with this new medium and it pushed me to look at how my work could benefit from
a more 3D approach.
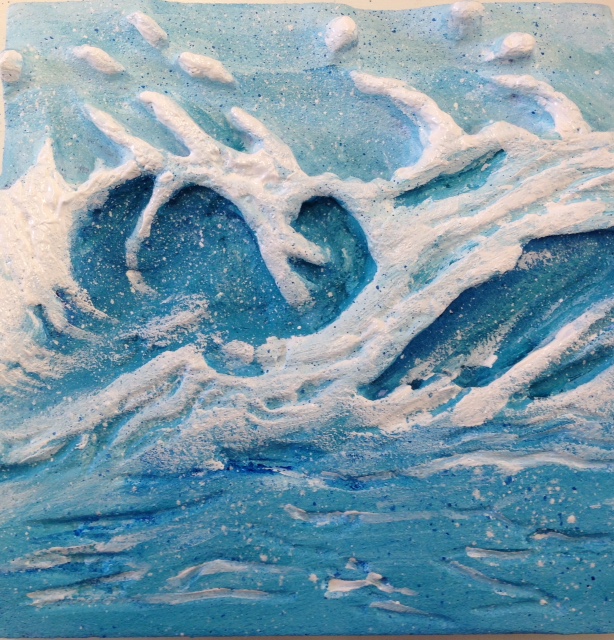
My first little experiment went rather
better than I had expected. I am known for my wave paintings and so I wanted to
see if this subject would translate to this new medium.
The principle of the material seems to be
to carve into it with tools, for example lino cutter, but also use knives and sandpaper to refine
the design. Then to paint it. You could
go full 3d to produce a sculpture piece, but I chose not to. I wanted to
explore working in relief, this was something
I had touched on many years ago, whilst on my Art Foundation course.
On opening the pack I was surprised to find
how light the block was. It felt a
little strange , slightly like polystyrene but denser. If I am honest I didn’t feel it would be easy
to use or be hard wearing. I almost
expected it to crumble as I cut it, only time would tell.
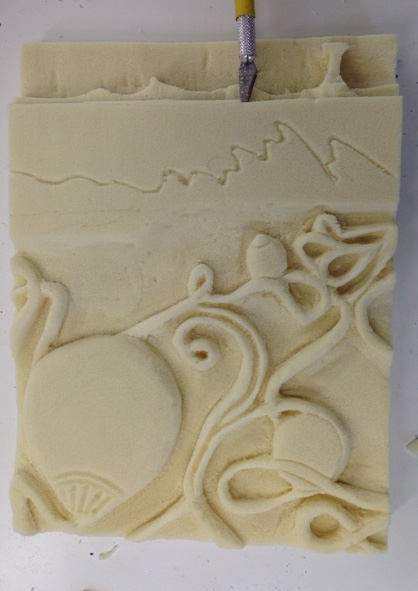
The first step was to choose a design and I
decided to go with the flow and just draw a wave straight onto the canvas. This I did with a fine felt pen, it was easy
to draw on and I discovered that you could lightly sand away, with some fine
grade sandpaper, any unwanted lines.

 I then had to think which areas I wanted to
be the deepest and which the shallowest to get the most out of the material. I chose at this stage to just go with 2
depths, so I cut away with the lino-cutting tools, above the crest of the wave. I did get a bit messy and soon realised, it
may have been better to be more organized than I was, but it was a great feeling just cutting away
and seeing what happened. I think if you
want to have as hap hazard approach then
either, mark or shade in the areas to
cut away, or concentrate on one area at a time and work slowly. I found the medium cut away nicely. I did create quite a bit of dust, that
collected both on my hands and on the work itself, this was easily sorted with
hand washing and a trusty old toothbrush to get the dust out of the cuts on the
canvas .
I then had to think which areas I wanted to
be the deepest and which the shallowest to get the most out of the material. I chose at this stage to just go with 2
depths, so I cut away with the lino-cutting tools, above the crest of the wave. I did get a bit messy and soon realised, it
may have been better to be more organized than I was, but it was a great feeling just cutting away
and seeing what happened. I think if you
want to have as hap hazard approach then
either, mark or shade in the areas to
cut away, or concentrate on one area at a time and work slowly. I found the medium cut away nicely. I did create quite a bit of dust, that
collected both on my hands and on the work itself, this was easily sorted with
hand washing and a trusty old toothbrush to get the dust out of the cuts on the
canvas .  I also felt it was important to step back once in a while to review
how it was going, like you would with any work, but I think especially when
workingh in a more 3 D way. You can
check on progress before it become to difficult to put any mistake right. As sculpting
was easier than I had expected, I did wish I had take the plunge and created
more layers, but I think in it was probably a good move to keep it simple for a first attempt.
I also felt it was important to step back once in a while to review
how it was going, like you would with any work, but I think especially when
workingh in a more 3 D way. You can
check on progress before it become to difficult to put any mistake right. As sculpting
was easier than I had expected, I did wish I had take the plunge and created
more layers, but I think in it was probably a good move to keep it simple for a first attempt.
I sanded each area with a rough grain
sandpaper as I went along, but I finished at the end with a overall tidying up
off all the cuts with a finer grade of sandpaper.
When finished I sealed the block with a
mixture of acrylic paint and an acrylic binder,
I then very roughly blocked out the canvas in the chosen colours . I
continued with more blending and detail on the next two layers, much like I
would on my normal canvases.
For my larger version I wanted to be braver
and add more depths. I estimated I could
cut away half the depth and not compromise the strength of the canvas. This seemed to work nicely. I worked from a sketch I already had, of a
harbour scene looking out in the distance at a lighthouse, with orange buoys very prominent in the foreground.
It has a strong perspective quality, so I felt it would work well in relief. It did become quite confusing at times as
this scene was far more complicated, so I had to be more organised. I cut the deepest area first and worked my
way up through 4 layers of various depths.
This time I decided to try priming it with PVA glue to see what would
happen . I found the first time I got a
lot of areas that took ages to cover.
The PVA seemed to work very well,
but needed overnight to dry and I
cant vouch for it longevity.

When painting I made sure I kept aerial perspective
in mind and chose lighter colors and used less detail in the distance. I added darker
stronger pigments in the foreground, which added another optical layer of
depth.

I think overall the medium is
brilliant. I do think you have to
compromise slightly on detail and try not to fit to much into one area as it
was not easy to cut around very small areas.
My main tip would be to make everything slightly bigger than you need
and then when you sand to finish off to a smooth surface, you don’t loose too
much definition. Being a terribly
impatient person I also used a hairdryer in between paint layers to speed up
the process and the block did not suffer
I was surprised at the strength of the
block , especially when I dropped it down the back of a radiator it was leaning
on to dry. I had to prod and poke to
several times with a ruler to get it out
and it faired very well. It was not at all crumbly like I had imagined.


I have yet to decide how to best present
the finished pieces. With the wave, it
was easy to paint the edges of the block, so this could be framed and mounted
on board. With the harbour painting I
couldn’t decide how to paint the edges, this would be something to consider for
my future pieces in this new medium.
I would definitely use again and would
highly recommend to any artist , especially those taking their first tentative
steps into sculpture , or those wanting to get extra depth into their
paintings.


Great fun and definitely a great experience